Q&A Blog: Does the Grandstream GSC3506 One-way SIP Intercom Speaker have Multicast Paging?

March 29, 2023 by Tony Monteleone

The Grandstream GSC3506 One-way SIP Intercom Speaker is a one-way public address SIP speaker that allows offices, schools, hospitals, apartments, and more to build powerful public address announcement solutions that expand security and communication. This SIP speaker supports integrated dual-band 802.11 a/b/g/n Wi-Fi and Bluetooth functionality, SIP paging and multicast paging.

Multicast paging on the Grandstream GSC3506 One-way SIP Intercom Speaker allows different SIP users listen for paging calls from a common multicast IP address. In multicast paging calls, an audio connection will be set up from sender to receiver, but the receiver will be only able to receive audio, a one-way communication. The two entities, Sender/Receiver, must be located on the same LAN (same broadcast domain).

To receive a multicast page, the GSC3506 must be well-configured to listen to the right address and port. The configuration is located under Phone Settings → Multicast/Group Paging. Up to 10 listening addresses are supported with priority levels from 1 to 10.

Multicast paging configuration requires a reboot to take effect.

Users can enable the “Paging Priority Active” option (under the Multicast Paging tab) to accept incoming paging calls during active multicast paging. The paging call with a higher priority than the active one will be accepted.

In the case of receiving a multicast paging call while on a unicast SIP call, the GSC3506 can choose to either keep the SIP call or hold this last and allow the multicast call, depending on the paging call priority.

This can be set using the “Paging Barge,” option. If the option is set to “Disabled” all incoming multicast paging calls will be dropped while on a SIP call. If the multicast paging call has higher priority than the value set on “Paging Barge”, the SIP call will be put on hold and the GSC3506 will be the incoming multicast paging.

Visit VoIP Supply’s product page or give our VoIP experts a call today at 1-800-398-8647 to find out more information!

Have you set up multicast paging on your Grandstream GSC3506 One-way SIP Intercom Speaker and have thoughts or comments you’d like to share? Please leave a comment below.

Unboxing the Yealink BH71 Pro Bluetooth Headset

The Yealink BH71 Pro Headset is one of the headsets from the new Yealink BH71 Bluetooth Headset series

In this video, we’ll unbox, set up, and run through this new generation headset’s features and functionality. 

The Yealink BH71 Pro model includes a specialized carrying case with a built-in battery that can recharge the earpiece, extending its 10-hour talk time by 20 hours, and a Bluetooth USB dongle to connect to devices that don’t have native Bluetooth support.

Watch this short video then visit our product page or reach out to our VoIP experts at 1-800-398-8647 for more information!

Watch Now: 2023 March VoIP News Update

March 28, 2023 by Tony Monteleone

Looking to get caught up on what’s new with VoIP? Then watch our VoIP News Update! In this month’s VoIP News Update, we’ll cover the top stories in VoIP! Including the new earbuds from Poly, the Poly Voyager Free 60 UC Series, Snom D Series Phones getting certified for Zoom, 3CX launching Update 7, which includes features that complement and complete Update 6, and Channel Partners Conference & Expo 2023 in Las Vegas!

How to Configure an Adtran NetVanta 1570-24-370W Switch

March 24, 2023 by Tony Monteleone

Adtran, a leading global provider of networking and communications equipment, has released their new NetVanta 1570-24-370W switch, part of the NetVanta 1570 Series.

The Adtran NetVanta 1570-24-370W is an enterprise-class, fully managed Gigabit PoE+ switch that offers advanced multilayer switching, high-bandwidth capabilities, and voice-aware features which are perfect for supporting highly resilient IoT, cloud applications, and Voice over IP (VoIP).

The 1570-24-370W switch can be configured by two methods: Web-based Graphical User Interface (GUI) or Command Line Interface (CLI).

Initial Switch Configuration Using a Web Browser:

After powering up the switch for the first time, you can perform the initial switch configuration using a web browser.   

To begin the initial configuration stage, reconfigure your PC’s IP address and subnet mask to make sure the PC can communicate with the switch. After changing the PC’s IP address (for example, 10.10.10.250), then access the web interface of the switch using the switch’s default IP address.

The factory default IP address of the switch is 10.10.10.1 and the subnet mask is 255.255.255.0. If the switch is connected to a Dynamic Host Control Protocol (DHCP) server, the server assigns the switch an IP address and the default 10.10.10.1 IP address is not configured. The DHCP server also assigns your PC the correct IP address to allow a connection on the same subnet as the switch.

To initially configure the switch, complete the following steps:

1. Power up the PC that you will use for the initial configuration. Make sure the PC has the Ethernet RJ-45 connector to be connected to the switch via a standard Ethernet LAN cable.

If the switch is connected to a DHCP server, skip to Step 3.*

*(NOTE: Users can also skip Steps 1-2, by pressing WinKey+R and typing the ncpa.cpl command to get to Step 4 directly)

2. Reconfigure the PC’s IP address and subnet mask as below, so that it can communicate with the switch. Be sure to record all your PC’s current IP settings to be able to restore them later.

For example, the method to change the PC’s IP address for a PC running Windows® 7/8.x/10 is as follows:

  • Type Network and Sharing into the Search box in the Start Menu.
  • Select Network and Sharing Center.
  • Select Change Adapter Settings on the left of PC screen.
    • Right-click on your local adapter and select Properties.
    • In the Local Area Connection Properties menu, highlight Internet Protocol Version 4 (TCP/IPv4). Then, select the Properties button.
    • Select the radio button. 
    • Use the following IP address and enter in the IP address for the PC (e.g., any IP address not in use, and in between 10.10.10.2 and 10.10.10.254), subnet mask (e.g., 255.255.255.0). 
    • Select OK to change the PC’s IP address.

3. Power up the switch to be initially configured, and wait until it has finished its start-up processes.

4. Connect the PC to any port on the switch using a standard Ethernet cable, and check the port LED on the switch to make sure the link status of the PC is OK.

5. Run your web browser on the PC; enter either the DHCP-assigned or factory default IP address to access the switch’s web interface. If your PC is configured correctly, you will see the login page of the switch requesting your username and password. In some browsers, the information needed may be requested in a new window. 

If you do not see the login page, perform the following steps: 

  • Refresh the web page.
  • Check to see if there is an IP conflict issue. 
  • Clean browser cookies and temporary Internet files.
  • Check your PC settings again and repeat Step 2.

6. Enter the factory default username in the login page. Select Login to log into the switch.

Initial Switch Configuration Using CLI:

The CLI can be accessed using any one of the two console ports (USB & RJ45) available on the switch. To establish the connection to the console port, the following are needed:

  • PC with VT100 terminal emulation software
  • Micro USB to USB cable or a DB-9 to RJ45 Serial Cable (the cables are provided along with the unit)

If you’re looking for more information about this switch, or have questions, contact one of our VoIP experts at 1-800-398-8647!

Did you successfully configure your Adtran NetVanta 1570-24-370W switch? Leave your comments below.

March 2023 VoIP Hardware Roundup: Fanvil H3 Hotel Phone, Snom’s D7XX Series is now Zoom-Certified, Base Station Pairings, and More!

March 22, 2023 by Tony Monteleone

Spring is here! And with the coming of a new season, we wanted to share some exciting news regarding some of our favorite VoIP Hardware. 

Fanvil H3 Hotel IP Phone

The Fanvil H3 Hotel IP Phone is now supported in CompletePBX. Xorcom released a new version of CompletePBX, version 5.2.13. CompletePBX 5.2.13 added the Fanvil H3 Hotel IP phone to EPM.

Snom D7XX Series

Snom’s D7XX Series of desk phones are now Zoom-Certified.

Snom’s D7XX Series consists of the following phones:

Snom D785
Snom D785N
Snom D735
Snom D717
Snom D713

Poly Studio P15 Personal Video Bar

The Poly Studio P15 Personal Video Bar is easy to set up and use so you can get it up and running in minutes and be ready to take on your next video meeting with professional video and audio quality.

Snom M500 Base Station

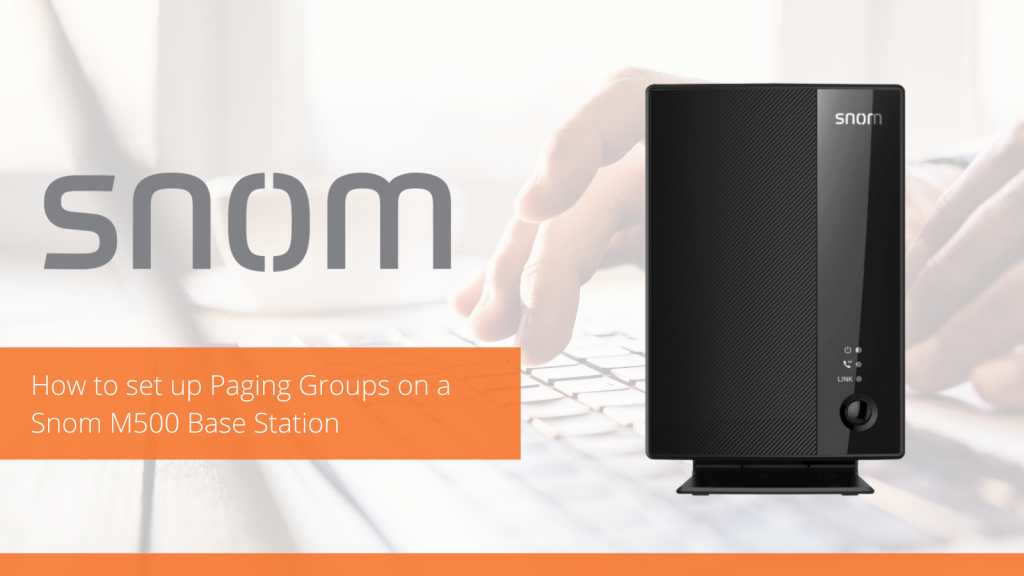
The Snom M500 Base Station can be set up in a dual-cell configuration so that you can pair more phones and increase the number of simultaneous calls.

The Snom M55 Handset and Snom M58 Desk Phone can be paired to the Snom M500 Base Station. Each Snom M500 Base Station pairs with eight phones and can accept eight calls simultaneously. To add more calls, easily pair a second base station for an additional eight calls. The M500 Base Station can be set up in a dual-cell configuration. In a dual-cell configuration, two M500 base stations are used. One is a primary base station, and the other is a secondary base station.

Did you know CyberData’s SIP Speaker and InformaCast-Enabled Speakers have New Names and New Features?

March 21, 2023 by Tony Monteleone

CyberData, a leader in designing, developing, and manufacturing innovative SIP Endpoints for the SMB, healthcare, education, and public/private sector and POS (Point of Sale) connectivity solutions, has made some changes and updates to two of their most popular speakers: the 011394 SIP Speaker and 011396 InformaCast-Enabled Speaker.

CyberData’s SIP Speaker and InformaCast-Enabled Speaker have been rebranded as SIP Speaker with Talk-Back and InformaCast-Enabled Speaker with Talk-Back.

The CyberData SIP Speaker with Talk-Back is a Power-over-Ethernet (PoE 802.3af/802.3at) and Voice-over-IP (VoIP) public address indoor speaker that easily connects into existing local area networks with a single CAT5/CAT6 cable connection. The speaker is compatible with most IP PBX servers. The speaker plays multicast messages, independent of the SIP environment. 

The CyberData InformaCast-Enabled Speaker with Talk-Back is a Power-over-Ethernet (PoE 802.3af/802.3at) and Voice-over-IP (VoIP) public address indoor speaker designed for use with Singlewire’s InformaCast paging and emergency notification software. CyberData’s InformaCast-Enabled speaker is compatible with Singlewire InformaCast v12.1, includes support for downloading SIP credentials from InformaCast, supports Singlewire InformaCast high-quality audio, and allows for simultaneous InformaCast, SIP, and multicast. The InformaCast-Enabled Speaker easily connects to local area networks with a single CAT5/6 cable from your PoE switch.

InformaCast is an emergency mass notification system that sends critical messages to on-premises devices and mobile users, helping keep people safe — by providing notification solutions for every need.

The Talk-Back feature, when enabled, provides full-duplex two-way conversations in indoor settings such as classrooms, offices, medical facilities, and clinics. When used with the Remote Call Button, calls to a predetermined extension can be initiated from the room with the speaker. Alternatively, a call can be placed to the speaker to initiate either a page or two-way conversation. This feature also allows for the speaker’s health check.

CyberData has added the following new features to the SIP Speaker with Talk-Back and InformaCast-Enabled Speaker with Talk-Back:

  • Audio health check
  • Ambient noise compensation
  • Talk-back capability

In addition to these updates, Cyberdata’s SIP Speaker and InformaCast-Enabled Speaker still include the full range of the rich paging solution features that they have been known for.

CyberData SIP Speaker with Talk-Back Speaker Features:

  • Simultaneous SIP and multicast 
  • Paging prioritization 
  • User-uploadable ring and alert tones 
  • Support for security code to prevent unwanted SIP calls 
  • Can receive pages directly from Poly phones as well as other devices that can send standard multicast 
  • Loud/Night Ringer function – second SIP extension 
  • Support for 10 multicast paging groups 
  • Can drive one external analog speaker for greater coverage 
  •  DTMF-controlled relay 
  •  Line-out connection 
  •  Network and manual speaker volume control 
  • TLS 1.2 and SRTP enhanced security for IP Endpoints in a local or cloud-based environment 
  • Auto-provisioning via HTTP, HTTPS, or TFTP 
  • HTTPS or HTTP web-based configuration. HTTPS is enabled by default 
  • 802.11q VLAN tagging 
  • Configurable event generation for device health and status monitoring 
  • Web-based upgradeable firmware 
  • Support for multiple SIP servers for redundancy

CyberData InformaCast-Enabled Speaker with Talk-Back Features:

  • Supports user-uploadable ring and alert tones, and up to ten stored messages 
  • Support for security code to prevent unwanted SIP calls 
  • Can receive pages directly from Poly phones as well as other devices that can send standard multicast 
  • Loud/Night Ringer function – second SIP extension 
  • Support for 10 multicast paging groups with prioritization
  • Support for Cisco SRST resiliency
  • Can drive one external analog speaker for greater coverage 
  • DTMF-controlled relay 
  • Line-out connection 
  • Network speaker volume control 
  • TLS 1.2 and SRTP enhanced security for IP Endpoints in a local or cloud-based environment
  • Auto-provisioning via HTTP, HTTPS, or TFTP 
  • HTTPS or HTTP web-based configuration. HTTPS is enabled by default 
  • 802.11q VLAN tagging 
  • Configurable event generation for device health and status monitoring 
  • Web-based upgradeable firmware 
  • Support for multiple SIP servers for redundancy

Contact one of our VoIP experts at 1-800-398-8647 to find the right solution for you.

Have you made the switch to one of Cyberdata’s Speakers and would like to Talk-Back? Leave a comment below.

How to set up the Snom M500 Base Station in a dual-cell configuration

March 17, 2023 by Tony Monteleone

Snom has introduced their new Snom M5XX DECT Series, which includes the Snom M55 DECT Handset, the Snom M58 DECT Desk Phone, and the Snom M500 Base Station.

The Snom M55 Handset and Snom M58 Desk Phone can be paired to the Snom M500 Base Station. Each Snom M500 Base Station pairs with eight phones and can accept eight calls simultaneously. 

To add more calls, easily pair a second base station for an additional eight calls. The M500 Base Station can be set up in a dual-cell configuration. In a dual-cell configuration, two M500 base stations are used. One is a primary base station, and the other is a secondary base station. 

This blog will describe how to set up a Snom M500 Base Station in a dual-cell configuration. We will discuss connecting the M500 Base Stations, configuring the M500 Base Stations to dual-cell mode, and checking the site-wide base status.

Connecting the M500 Base Stations

Facility without network infrastructure:

  1. Plug an Ethernet (network) cable into the RJ45 connector labeled “NET” on the primary base station, and plug the other end into the network side to establish a data link. 
  2. Plug an Ethernet (network) cable into the RJ45 connector labeled “MULTI-CELL” on the primary base station, and plug the other end into the RJ45 connector labeled “NET” on the secondary base station.

Facility with network infrastructure

  1. Plug an Ethernet (network) cable into the RJ45 connector labeled “NET” on the primary base station, and plug the other end into a network switch to establish a data link. 
  2. Plug an Ethernet (network) cable into the RJ45 connector labeled “NET” on the secondary base station, and plug the other end into a network switch to establish a data link.

Configuring the M500 Base Stations to dual-cell mode

WebUI

1. Open a Web browser. In the address bar, enter the IP address of the primary base station.

2. On the System → Base Preferences page, click the Mode list and select “Primary”.

3. Open a Web browser. In the address bar, enter the IP address of the secondary base station.

4. On the System → Base Preferences page, click the Mode list and select “Secondary”.

5. Repeat step 3-4 for additional base stations.

Provisioning

Import the following setting value to to the primary base station via provisioning.

multicell.role = primary

Import the following setting value to to the secondary base station(s) via provisioning.

multicell.role = secondary

Checking the Site-wide Base Status

You can check the status of the base station(s) via the WebUI or exporting the configuration file.  

WebUI

  1. Open a Web browser. In the address bar, enter the IP address of any base station in your dual-cell configuration.
  1. Open the Status → Base Status page. 

The table provides a site-wide base listing. The primary base will always be listed as Base 1. All joined secondary base(s) will form the rest of the list. Use the IP and MAC columns to identify the base device.

Provisioning

  1. Export the configuration file of the primary base station (WebUI: Servicing → Provisioning → Export Configuration → Export button).
  2. Examine the values of the settings listed below. 

“x” = 1 will list the primary base, and “x” starting from 2 will list out all secondary base(s) as each secondary base joins the primary base as part of the site. 

multicell.device.1.ip = 10.91.20.11
multicell.device.1.mac = 000413BB02E0
multicell.device.2.ip = 10.91.20.109
multicell.device.2.mac = 000413BB04C7

If you’re looking for more information or have questions, contact one of our VoIP experts at 1-800-398-8647!

Have you used the Snom M5XX DECT Series yet? Have you set up two M500 Base Stations? Let us know by leaving a comment below.

Cost Savings on Like-New Phones during Daylight Savings!

March 15, 2023 by Tony Monteleone

Don’t lose another hour of sleep worrying about the price of phones. Check out VoIP Supply’s Refresh Line of like-new phones. Customers looking for refurbished and like-new phones know they can get quality refurbished devices for a great price from VoIP Supply.

All Refresh Products have undergone an extensive 10-step process in which they were inspected, tested, fully cleaned, upgraded to the latest firmware, and repacked for sale.

Check out our 8 hottest like-new Poly and Yealink phones to spring forward with! 

Polycom VVX 250:

The Refurbished Polycom VVX 250 is a robust color IP phone for small offices and cubicle workers. The VVX 250 UC phone features enterprise-grade HD sound quality and reliable performance with a 2.8” color display.

  • 2.8” color LCD screen (320 x 240-pixel resolution)
  • 4 line keys
  • 4 soft keys
  • In-call keys: call transfer and hold
  • Illuminated audio keys
  • HD audio
  • 1 USB port
  • 2x Gig-E ports

Polycom VVX 350:

The Polycom VVX 350 is a 6-line mid-level IP phone ideal for small to medium-sized businesses (SMBs). This high-quality phone has a color display and features Polycom’s HD Voice and Polycom’s Acoustic Fence Technology that work together to drastically improve voice clarity.

  • 3.5” color LCD (320 x 240 pixel resolution)
  • 6 line keys
  • 4 soft keys
  • In-call keys: call transfer, hold and voicemail
  • Illuminated audio keys
  • HD audio
  • 2 USB port (rear and side)
  • 2x Gig-E ports

Polycom VVX 450:

The Polycom VVX 450 is a 12-line high-end IP phone with advanced enterprise features that any business can benefit from. It has a 4.3” color display and features Polycom’s HD Voice and Polycom’s Acoustic Fence Technology that work together to drastically improve voice clarity.

  • 4.3” color LCD (480 x 272 pixel resolution)
  • 12 line keys
  • 4 soft keys
  • In-call keys: call transfer, hold and voicemail
  • Illuminated audio keys
  • HD audio
  • 2 USB ports (rear and side)
  • 2x Gig-E ports

Polycom VVX 411:

The Polycom VVX 411 is a 12-line HD Voice business media phone with a 3.5″ color LCD display and dual Gigabit RJ45 ports for knowledge workers and office staff. The Polycom VVX 411 has an intuitive larger color display and easily integrates with third-party UC and productivity applications helping make it easier to use.

  • 12 line appearances
  • Polycom HD Voice
  • 3.5″ (320 x 240) backlit color LCD
  • Dual Gigabit RJ45 ports
  • RJ9 headset port
  • Built-in auto sensing IEEE 802.3 af Power over Ethernet
  • Optional 48V DC power supply (not included)
  • Easy integration with Unified Communication platforms
  • VVX Expansion Module support
  • 4-way directional navigation key
  • 12 hard keys with basic icon keys included
  • Wired or Wireless Headset Support

Polycom VVX 501:

The Polycom VVX 501 is a 12 SIP line multimedia IP phone with dual 10/100/1000 PoE Ethernet ports and a 3.5″ gesture-based, multitouch-capable, capacitive touchscreen.

  • 3.5” TFT LCD display at QVGA (320 x 240 pixel resolution), 4:3 aspect ratio
  • Streaming media video playback
  • Screensaver and digital picture frame mode
  • On-screen virtual keyboard
  • Voicemail and video mail support
  • Dual USB ports (2.0 compliant) for media and storage applications
  • Polycom HD Voice technology delivers life-like voice quality for each audio path-handset, the hands-free speakerphone modes
  • Dedicated RJ9 headset port
  • Dual 10/100/1000 Ethernet port with PoE Support
  • Codec Support: G.711 (A-law and μ-law), G.729AB, G.722, G.722.1, G.722.1C

Polycom Trio 8500:

Polycom Trio 8500 brings the renowned Polycom conference call efficiency and brings it to the midsize conference room in a compact size that does not sacrifice quality. With a three-microphone array, the Polycom Trio 8500 can pick up voices in 360° and as far away as 14 feet.

  • 5” color LCD (720 x 1280 pixel)
  • On-screen virtual keyboard
  • 3 cardioid microphones
  • 14ft/4.3m microphone pickup range
  • Polycom HD Voice
  • Polycom Acoustic Clarity technology
  • Polycom NoiseBlock 
  • Voice activity detection
  • Polycom Zero Touch Provisioning
  • QoS Support
  • Open SIP and Microsoft Lync 2013/ Skype for Business/Office365 Cloud PBX

Yealink T42S:

Yealink T42S with Opus support brings the same elegant look and feel of the previous T4 Series models, but with the added bonus of enhanced performance at no added cost.

  • 2.7” 192 x 64-pixel graphical LCD with backlight
  • USB2.0
  • Opus
  • Gigabit
  • Up to 12 SIP accounts
  • Paperless label design
  • EHS support
  • PoE support
  • USB recording
  • Integrated stand with two adjustable angles
  • Wall-mountable

Yealink T54W:

The Yealink T54W is a Linux-based mid-level IP phone with a 4.3″ pixel color display that is fully adjustable. The T54W supports 10 line keys and 16 SIP accounts and features built-in Bluetooth and Wi-Fi.

  • Mid-level phone, ideal for professionals and managers with moderate call load
  • 4.3″ 480 x 272-pixel color display, fully adjustable
  • HD Voice with Yealink Acoustic Shield technology
  • 10 line keys, 16 SIP accounts, 27 memory keys
  • Built-in Bluetooth, Wi-Fi
  • Dual-port Gigabit Ethernet
  • 1xUSB port for call recording and wireless USB headset
  • Power supply sold separately

Give our VoIP experts a call today at 1-800-398-8647 for more information!

Get these and more refurbished phones on our website.

Q&A: Is the Fanvil H3 Hotel Phone Supported in CompletePBX?

The Fanvil H3 Hotel IP Phone is now supported in CompletePBX.

Xorcom released a new version of CompletePBX, version 5.2.13. CompletePBX 5.2.13 added the Fanvil H3 Hotel IP phone to EPM.

Now that Fanvil H3 Hotel IP Phone is supported in CompletePBX, these phones can take advantage of the following improvements and bug fixes that come with the new CompletePBX Release – 5.2.13: 

PBX Improvements

  • Improved API functionality – some functions worked differently from expected: announcements, destroy_announcement, modify_announcement, custom_destinations, destroy_custom_destination, modify_custom_destination
  • Extension defaults are inconsistent between GUI and API
  • IVR data collection – AMI and CEL events are now generated when IVR goes to Invalid or Timeout, allowing later presentation of such data.
  • New features added to Bulk Modification (PBX -> Extensions -> Bulk Modification):
    • Call waiting
    • Fax settings
    • IP phone provisioning (Endpoint Manager)

Bug Fixes

  • Complete Concierge licenses showed incorrect Max and Used figures
  • Unable to restore backup due to character encoding in some cases
  • Standard dialplan variables do not work in custom applications
  • The default class of service is not selected when creating a custom destination
  • Missing unique key for application users – as a result, a user may be assigned to the same application twice.

The Fanvil H3 IP Hotel Phone is an economical, yet reliable hotel phone with a contemporary appearance and excellent voice quality. The Fanvil H3 has 6 programmable soft keys that can be easily programmed for the service hotline (Housekeeping, Ticketing, Switchboard, Food and beverage, etc) and the hotel’s considerate services (Morning call, Voice message, etc).

Xorcom designs and manufactures business telephony solutions that support both traditional and VoIP communication. Their solutions are easy to install and maintain and are cost-effective since there are no per-user license fees. 

CompletePBX is the heart of Xorcom hardware and software phone systems. Built on top of the solid Linux and Asterisk platforms, it’s built for stability and performance.

Give our VoIP experts a call today at 1-800-398-8647 to find out the best options for you!

Have you used a Fanvil H3 Hotel Phone and have comments you’d like to share? Please leave a comment below.

How to Set up the Poly Studio P15 Personal Video Bar

March 10, 2023 by Tony Monteleone

The Poly Studio P15 Personal Video Bar is easy to set up and use so you can get it up and running in minutes and be ready to take on your next video meeting with professional video and audio quality.  

Connect your Poly Studio P15 Personal Video Bar device to your computer with the provided USB cable. Once you plug in the device, you can start using the personal video bar. Please note that a separate adapter is required to connect to the USB-A port on a PC/Mac and that this adapter is not included.

The Poly Studio P15 Personal Video Bar includes a removable monitor clamp that fits security atop your display with easy adjustments for the optimal angle.

When setting up your Poly Studio P15 Personal Video Bar, mount and position the camera so that your eyes are level with the top third of your screen and your face appears in the middle area of the video stream.

In a home office, position the camera to an appropriate angle and consider disabling the tracking feature to avoid capturing potential distractions in your video (for example, other people, pets, or TVs). If you are in a conference or meeting room with other people, keep the view focused on people and not the background or room furnishings.

The Poly Studio P15 Personal Video Bar provides exceptional optics, powerful audio, automatic camera framing, and cutting-edge noise-blocking technology. Once you have set up your Poly Studio P15 Personal Video Bar, you can preview your video stream before you join a meeting and make sure your video quality is at its best and professional looking and that your camera settings are configured correctly.

There are many reasons why video may not look the way you expect. Are the colors not right? Does the video break up? Is there noise?

Use the following recommended advanced tips and guidelines to enhance or improve your experiences during video conferences.

Lighting

▪ Close any curtains, drapes, or blinds over your windows. Daylight is a variable light source and can conflict with interior room lighting.

▪ Bright lighting increases the range of in-focus objects, but inappropriate direct lighting might make you look harsh. Poly recommends using indirect fluorescent lighting in a mid-range, neutral color temperature (3600 K to 4500 K).

Audio and Noise

▪ Mute your audio when you’re silent or before you move your audio device.

▪ Keep your windows and doors closed to minimize unwanted noises.

▪ Close any drapes or blinds over your windows. The glass from window panes can cause issues with acoustics due to reflection.

▪ If you’re in an open or common area, consider using a headset with Active Noise Canceling (ANC) to minimize distractions.

▪ Poly NoiseBlock AI helps the microphone eliminate unwanted noises while picking up your voice. If you’re not using Poly NoiseBlock technology, consider these additional audio suggestions:

◦ Don’t obstruct your microphone with papers or other objects.

◦ Avoid tapping on the table or rustling papers.

Clothing, Furnishings, and Backgrounds

▪ To avoid disruptions, exclude the following from the camera view: light sources, tables, chairs, walls, busy decorations, and the floor.

▪ To avoid funny effects, wear clothes that contrast with the background instead of blending into it, and make sure nothing in the background seems to stick out of anyone’s head.

▪ Avoid glossy tabletops, strong colors, or bold wood grain in the room. The best table surface color is a flat satin finish in neutral gray.

▪ A wall that’s painted light gray with a touch of blue works best as a background. Video conferencing systems use a gray or blue reference image to process the video, so a background in that color helps to enhance the video you send.

Learn more about the useful features of the Poly Studio P15 Personal Video Bar camera here or call our VoIP experts at 1-800-398-8647 today!

Now that you are all set up, leave a comment below and share your experiences. 

  • Featured Posts

  • Popular Posts

  • Read Our Feed

  • Latest

  • VoIP Post Categories

  • Archives