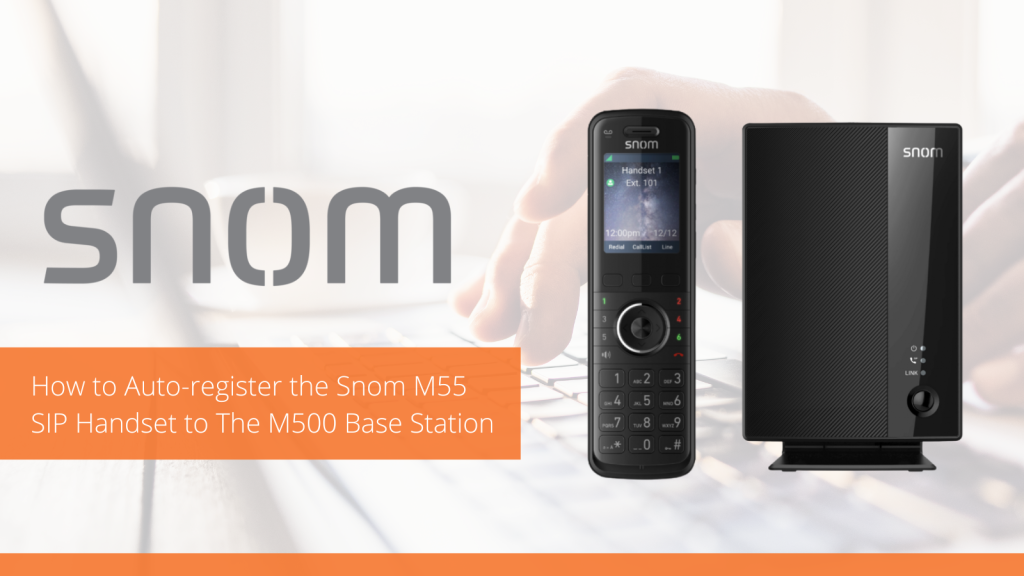
In our latest episode of SIP Chats, our good friend Simon Bradbrook returns to the show to deliver some exciting news on Snom’s new M500 Series of DECT phones! Watch now and get all of your questions answered about this new and exciting series of phones that is sure to increase mobility and productivity for you and your business!
To enable call functionality, the Snom M55 SIP DECT Handset requires registration to the base station. Upon initial power-up, the handset will automatically attempt to register to the base station. Successful auto-registration relies on either configuring the M500 file with the handset’s IPEI or inputting the IPEI on the Primary base station’s WebUI.
Below are the steps to Auto-Register your M55 SIP Headset to the M500 Base Station:
Make sure the base station is connected to power and the network. (Don’t laugh haha people actually forget to do this!!)
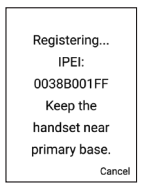
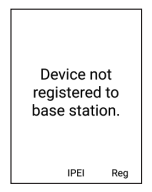
If the handset is displaying the following screen:
Wait for the handset to auto-register.
If the IPEI has not been set up in the configuration file (provisioned), or the auto-registration is taking too long, press Cancel.
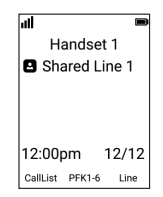
If the handset is displaying the following screen:
Press Reg. The handset displays the “Register via” menu.
Press or to scroll to Auto reg or IPEI input, and press Sel.
Wait for the handset to auto-register.
If auto-registration is taking too long, press Cancel.
If Registration is Successful (YEAH!):
The handset beeps and displays “Handset registered”, and then displays the idle screen.
If registration fails, don’t panic just yet… you can try these steps:
The handset displays “Registration failed”.
Press OK. The handset displays “Device not registered to base station.”
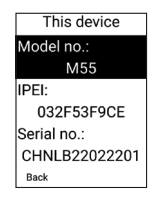
Press IPEI to display the handset’s IPEI and serial number. Give these numbers to your phone administrator.
Press Back.
If the auto-registration doesn’t work, you can try to Manually register the device via the LINK key on base station or you can Manually register via the Web UI. These two options are a little more involved, but can be done by following a couple different steps. If you need assistance with the manual configuration, leave a comment below and we can provide you with some additional information.
Get your monthly dose of VoIP News now with our June VoIP News Update! This month, we cover some exciting new releases from Grandstream and Poly! Learn everything you need to know about Grandstreams new GWN7000 Series! Including the GWN7001, GWN7002, and GWN 7003.
We’ll also take a deep dive into two brand-new releases from our friends at Poly! Get to know the new Voyager Surround 80 headset. This headset is not only a feature-rich replacement for the Voyager 8200, but it is also available in UC & Microsoft Teams versions! On top of this exciting new headset is Poly’s new videobar, the X52! Never has all-in-one video conferencing been this simple to use!
Have you already gotten your hands on any of these new products? If so, let us know what you think in the comments!
Let’s face it, managing calls can be a nightmare for businesses. But fear not, Yealink IP Phones have got your back! With their seamless call transfer feature, you can ensure smooth communication and provide exceptional customer service. So, let’s dive into our blog and learn how to boost your productivity and streamline your communication workflow with Yealink IP Phones.
Step 1: Initiating the Call Transfer: When you receive a call that needs to be transferred, follow these steps:
Press the “Transfer” or “Trn” soft key on your Yealink IP Phone. This action will put the caller on hold.
Step 2: Choose the Transfer Destination: Next, you need to determine where you want to transfer the call:
Enter the extension number of the person to whom you want to transfer the call. Alternatively, you can use the phone’s directory or call history to select the desired recipient.
Step 3: Announcing the Transfer (Optional): Before completing the transfer, you may want to announce the call to the recipient:
If you wish to speak to the recipient before transferring the call, press the “Announce” or “Talk” soft key.
Wait for the recipient to answer, and have a brief conversation to explain the nature of the call transfer.
Step 4: Completing the Transfer: Once you’re ready to transfer the call, proceed with these steps:
Press the “Transfer” or “Trn” soft key again. This will instantly transfer the call to the chosen recipient.
Hang up your phone to disconnect from the call entirely.
Step 5: Transfer to Voicemail (Optional): If the intended recipient is unavailable, you have the option to transfer the call to their voicemail:
Instead of hanging up after step 4, stay on the line and listen for the recipient’s voicemail prompt.
Press the “Transfer” or “Trn” soft key one more time to send the call directly to voicemail.
Use the phone’s directory or speed dial feature to quickly access frequently contacted colleagues or departments during call transfers.
If your phone supports it, take advantage of the attended transfer feature, which allows you to consult with the recipient before completing the transfer.
Explore advanced call transfer settings in your phone’s configuration, such as configuring transfer rules or customizing transfer behavior to meet your specific needs.
Efficient call management is vital for businesses, and the ability to transfer calls seamlessly plays a significant role in delivering exceptional customer experiences. By following the step-by-step guide outlined above, you can master call transfers on your Yealink IP Phone. Empower your team with this valuable skill and optimize your communication workflow for increased productivity and improved customer satisfaction. Remember, each Yealink IP Phone model may have slight variations in the user interface and soft key labels. If you have questions or suggestions, let us know by visiting www.voipsupply.com or give us a call at 1-800-398-8647!
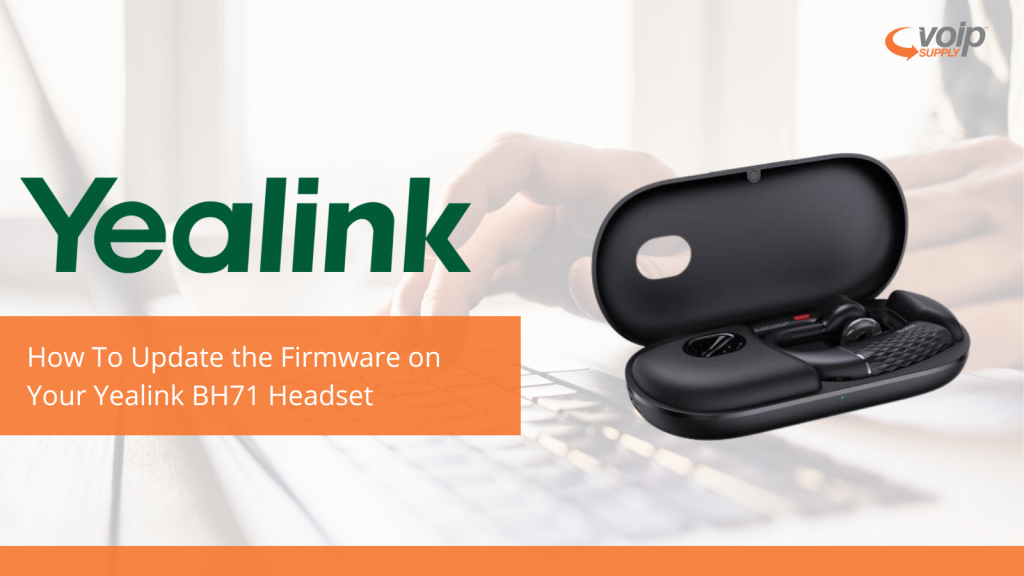
Do you have a Yealink BH71 Pro headset? It might be time to update it to the latest firmware! Firmware is the type of software that is in your physical device Firmware updates are typically meant to improve the functionality of your device. Yealink created an update so users can have an even better microphone noise-canceling experience by upgrading to the newest firmware.
To upgrade while on the stand:
Power on the BH71 Pro headset and stand it on the charging case in order for the Yealink USB Connect (YUC) to recognize the headset is connecting via USB.
Visit Yealink’s official support website here and download the right firmware for your device.
Once downloaded, open the YUC and go through the prompts until you get to Install.
The YUC will connect to the case.
You’re now officially connected and upgraded to the latest firmware.
Within the Yealink USB Connect software, you can update your device if necessary, reboot your device, find more support articles, check the current battery life of your headset, and more. It’s always a good idea to stay up-to-date with the latest updates available to you so you can have the best performance possible.
If you have any questions, please leave a comment below!
HP Poly, formerly known as Polycom and Plantronics now has an extensive line of products and has some of the top-rated VoIP Phones in the market. Some of their most popular models include the VVX 250, 350, and 450 VoIP Phones. The Poly VVX series was specifically designed with quality and cost-savings in mind. These phones integrate with leading platforms to help achieve VoIP cost-savings while delivering one of the industry’s best sound quality and features people love.
With so many businesses utilizing these Poly VVX Series Phones, we thought we would share some quick “how to” tips and tricks to easily and quickly place, answer, and transfer calls on the Poly VVX 250, 350, and 450 VoIP Phones.
To Place a Call:
Do one of the following:
➢ Pick up the handset, press or , enter the phone number, and press Send.
➢ Enter the phone number, press Dial, and pick up the handset, or press or
➢ Press the Line key, enter the phone number, and select Send.
➢ Select New Call, enter the phone number, and press Send.
To Answer a Call:You can answer calls using the handset, speakerphone, or a headset.
Do one of the following:
➢ To answer with speakerphone, press or press Answer soft key.
➢ To answer with the handset, pick up the handset.
➢ To answer with a headset, press
To Transfer a Call:You can transfer calls to any contact.
Press and hold the Transfer soft key or press
Choose Blind or Consultative.
Dial a number or choose a contact. If you choose Blind, the call is transferred immediately.
If you choose Consultative, press the Transfer soft key or press after speaking with the contact you chose.
These were just a few quick and easy ways on how to place, answer, and transfer calls on the Poly VVS Series 250, 350, and 450 VoIP Phones. For more information on these or any other VoIP phones, please visit www.voipsupply.com or leave a comment below!
Good news! Managing your Algo devices just got a lot easier! We have been so impressed with their Device Management Platform lately, so much so that we decided to team up with Ryan Zoehner of Algo Solutions to provide a detailed overview of ADMP!
Watch above as Ryan breaks down the ADMP dashboard and shows you how to take control of your Algo devices from one location with ADMP!
Have you thought about using ADMP? Or are you currently using the Algo Device Management Platform? If so, let us know what you think! And, if you’re on the fence, there is currently a free trial available to test the waters and see if it’s right for you!
Are you still using Skype for Business (3PIP) IP phones? If the answer is yes, then you want to ensure those endpoints will still work seamlessly within a Teams environment. Lucky for you, we work with many authorized Microsoft Teams partners and they have put together some great resources that we would like to share with you.
By migrating your Skype for Business IP phones with standard SIP firmware, Cisco IP phones with multiplatform SIP firmware, or SIP devices from vendors such as Poly, Yealink, and AudioCodes, you can utilize all of the amazing features you are familiar with, such as Team meetings, call transfers, call queues, and voice apps support.
But let’s be real, migrating systems can be daunting. That’s why it’s important to do your research and make a plan before diving in. You are going to want to start by getting familiar with the Teams SIP Gateway. In short, SIP Gateways allow you to use any of the devices we mentioned above with Microsoft Teams!
There are some important requirements to keep in mind that you will need to be aware of before starting this migration process to the Teams SIP Gateways. The most important is that the Teams user must have a phone number with PSTN (Public Switched Telephone Network) calling enabled to even use the SIP Gateway.
If you are using a 3PIP or SIP device, you MUST have a License for Microsoft Teams, Skype for Business Online Plan 2, Microsoft 356 Phone System (Via E5 or standalone licenses), PSTN enablement via a Microsoft Teams Calling Plan, Direct Routing or Operator Connect and lastly a Microsoft Teams Shared Devices license for any common area devices. For an updated list of compatible devices click here!
Some personal advice from my own migrations: don’t be afraid to lean on your IT team or reach out to Microsoft for support. They’re there to help walk you through the process and ensure a smooth transition. Another tip that I wanted to share with you is to check the manufacturer support pages. They tend to have very helpful information on the best way to upgrade your devices to ensure a smooth transition. To help you locate some of these resources, we have listed a couple of links below!
Don’t let the fear of change hold you back. With a little bit of planning and support, migrating your Skype for Business devices to the Microsoft Teams SIP Gateway can be a breeze. So, let’s get to it and embrace the future of workplace communication!
When you are running a business, there are a trillion things to worry about (probably literally) and I am sure every business owner wishes they were able to focus on just running their business. You want to focus on sales, you want to focus on marketing, you want to focus on business processes…NOT trying to get pallets together and products shipped in and out all day long in a logistical nightmare and a sea of inventory. Well, I’ve got great news, VoIP Supply can provide you with the services you need so that you CAN just focus on the aspects of your business that you want to!
The team behind VoIP Fulfillment by VoIP Supply has been providing provisioning and fulfillment to VoIP Service Providers since the industry’s beginning. Since 2005, VoIP Supply has been successfully completing VoIP fulfillment for clients directly through our multiple warehouse locations in North America. Over the years, VoIP Supply has added and expanded our provisioning and fulfillment capabilities to meet our customers’ needs and stay ahead of changes in technology.
VoIP Fulfillment Services Include:
Products and Configuration: Have a trained VoIP Technology Expert help select the right device for your service. VoIP Supply will custom configure your devices to your specifications as well as have return equipment “Refreshed” for use again!
This includes:
Device Selection Consultation
Product Provisioning
Product Testing/Repair/Reconditioning
RMA Product Refresh/Inventory Buy Back Program
Warehouse and Logistics: VoIP Fulfillment eliminates the need and expense of a warehouse while allowing you to leverage the global logistics infrastructure of North America’s leading supplier of VoIP equipment with these warehousing and logistics services!
Key Features include:
Multiple Carriers
Blind Shipments
Branding and Marketing
Shortest Turnaround Times
Ordering and Integration: Seamlessly integrate your existing systems electronically with VoIP Supply’s, easy to incorporate and execute, API. Using either our online customer portal or our API, we receive your customer shipping information and almost immediately, process the orders and when applicable upload & post back to you all pertinent customer order information and MAC addresses of the device(s) being shipped to that specific customer. Order entry and RMA interface:
Full EDI/Internet Accessible
Order entry via XML API (via http post or SOAP) or manual entry
Application tracking API, XML push to your API, and automated inventory updates and email reporting
Account Management and Support: Access important operational and service data on-demand in real-time from anywhere via your account management portal, your customized phone App or live account manager with VoIP Fulfillment’s account management and support services.
Real-Time reporting of open orders, order history, and inventory and tracking
Documentation management and customizable management reporting
Real-time access to inventory levels, auto-replenishment, serial and MAC address details
Customized reporting or inventory, invoicing, RMA data, and shipping and tracking information
VoIP Supply’s Fulfillment services have continued to evolve and improve over time, leveraging current technologies and passing along access and efficiency to the customers. If you are interested in VoIP Supply Fulfillment Services visit our website at https://www.voipsupply.com/fulfillment or give us a call at 1-800-398-8647 or leave a comment below and we will get back to you as soon as possible!
HP Poly, formerly known as Polycom and Plantronics now has an extensive line of products and over the last couple of years has been making important software improvements to many of their most popular products.
We often have customers reach out to us asking for assistance with understanding which software version they might need for their device or how to actually update their software. We know firsthand that it’s difficult to sift through pages and different websites to locate this information, so we have included a couple of links below that will help you find the poly software update information you are looking for.
If you are looking to update the software of your Poly (Polycom) VVX phone, SoundStructure, or SoundStation IP then check out the information below.
The Latest Poly UC Software Release page will highlight the most important and recent software updates that Poly has released. Once you are on this page, you will see they have broken down the devices and the latest software upgrades. They will also let you know if you need to do chronological software updates or if you can just update to the latest version. This is a very important step to pay attention to. Oftentimes customers will just update the software without checking to see if they need to do multiple updates in order to get to the latest… it’s probably one of the number one mistakes we see. So checking this page can save you a lot of hassle.
Click here for Poly’s Better Together Over Ethernet connector (BTOE) application support matrix. This page also includes links to detailed release notes which can be located under the title of the release version.
If you were not able to locate the Poly (Polycom or Plantronics) software update, leave a comment below and we will help to connect you to the right information!