Introducing the brand-new healthcare intercoms from Fanvil! This video will feature the A10W and the Y501W-Y intercoms, and believe me, they didn’t disappoint! Depending on your needs, Fanvil has come up with a version for you! These intercoms are ideal for hospitals, clinics, nursing homes, and more.
Having hands-free communication within the healthcare sector has become so important these days, and we were very pleased with the solutions that Fanvil has brought to the table. Watch this product feature video and see for yourself!
Are you currently using Fanvil intercoms? Or plan on trying these out for your next project? Drop us a comment below and let us know!
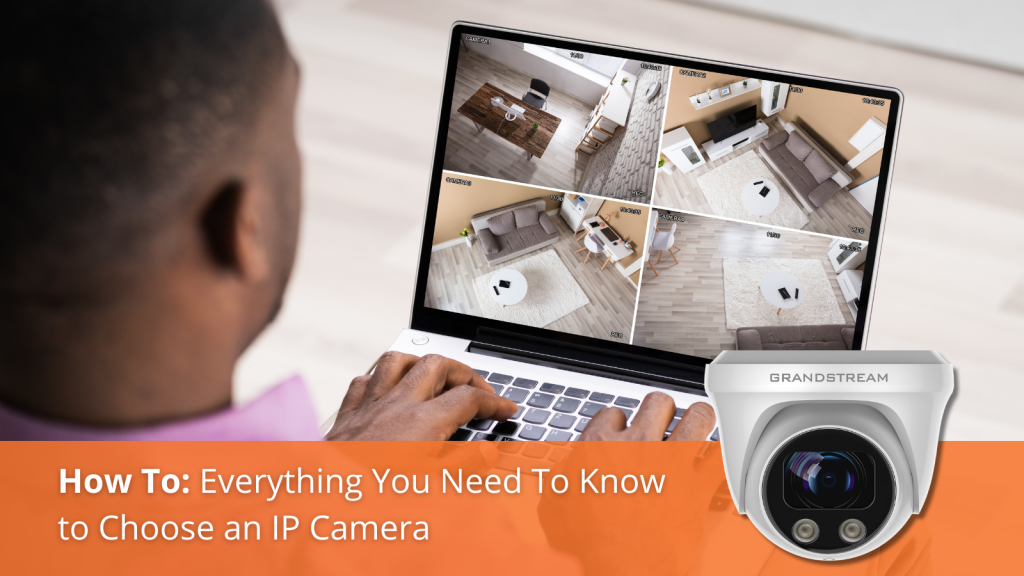
IP cameras have become a crucial tool for security, surveillance, and peace of mind. But with the multitude of options available, choosing the right IP camera can be overwhelming. That’s where VoIP Supply comes in. In this blog post, we will walk you through what you need to know to make the best decision and find the perfect IP camera for your specific needs.
An IP camera, also known as an Internet Protocol camera or network camera, is a type of digital video camera that is used for surveillance and security purposes. Unlike traditional analog cameras, IP cameras use the Internet Protocol to transmit video and data over a network
When considering which IP camera will work best for you, it is important to consider the characteristics and capabilities. Below are some of the key characteristics of IP cameras.
IP cameras capture video in a digital format, allowing for high-quality footage with higher resolution compared to analog cameras. This will be important when needing clearer images or recordings.
IP cameras connect to a network via Ethernet cables or Wi-Fi, enabling remote access to live and recorded video from various devices like computers, smartphones, or tablets. It is important to have a stable and robust network in order to ensure little to no interruption or data corruption.
Each IP camera has a unique IP address that helps identify and access it on the network. This address is essential for remote viewing and management.
IP cameras can be powered through traditional electrical outlets or via Power over Ethernet (PoE), where both power and data are supplied through a single Ethernet cable.
IP cameras come in various form factors, including dome, bullet, PTZ (Pan-Tilt-Zoom), and specialty designs to suit different surveillance needs. This is important to consider when thinking about camera placement and coverage.
Many IP cameras offer features such as motion detection, night vision, two-way audio, and integration with network video recorders (NVRs) or video management software (VMS). If you are looking for advanced security and/or communication with IP cameras, these might be the ones for you.
Users can access their IP camera’s live feed and recorded footage from anywhere with an internet connection. This allows for real-time surveillance and playback of events.
IP cameras can store video footage locally on an SD card or network-attached storage (NAS) device, or in the cloud for remote access and backup.
Is your head spinning from all of the information and options? Don’t worry, VoIP Supply Experts are here to help! Please feel free to leave a comment or question below, give us a call at 1-800-398-8647, or visit us at www.voipsupply.com to chat with an expert today!
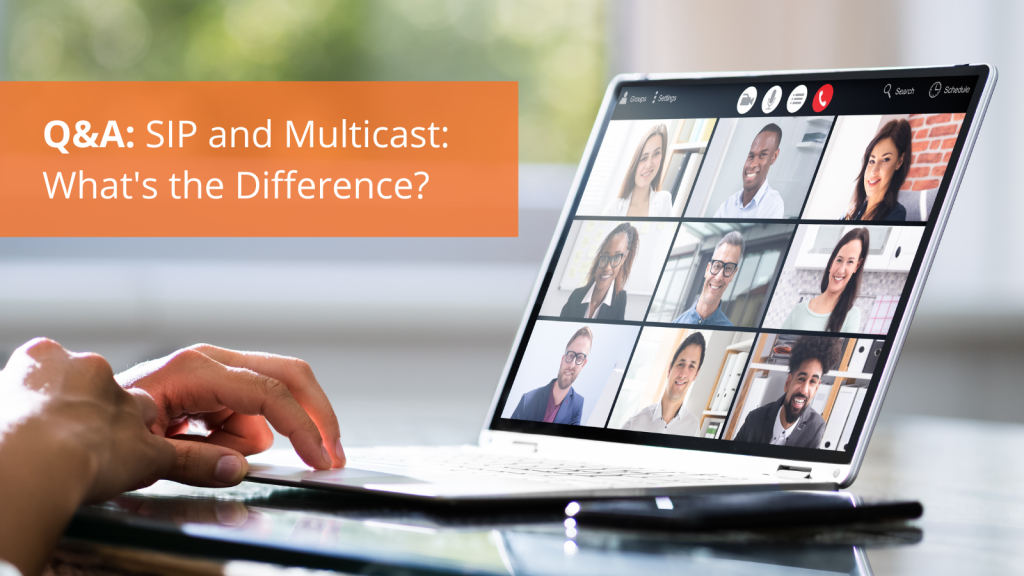
You are probably familiar with SIP (Session Initiation Protocol) and Multicast. But do you know the main differences in purpose and characteristics between these two common technologies? To ensure you make the most informed decision possible when implementing your communication systems, you can rely on VoIP Supply to provide you with a simple blog post breaking these protocols down:
1. Purpose:
SIP: Designed for one-on-one or small group interactive communication, like VoIP and video conferencing.
Multicast: Ideal for one-to-many or many-to-many communication, broadcasting content to multiple recipients.
2. Scalability:
SIP: Works well for small and large-scale applications but is better suited for smaller interactions.
Multicast: Efficiently serving a large number of recipients, reducing network congestion.
3. Network Traffic:
SIP: Generates separate streams of data for each communication session, potentially increasing network congestion.
Multicast: Minimizes network traffic by delivering data to a group of interested recipients, optimizing network utilization.
4. Applications:
SIP: Commonly used for real-time, interactive communication like voice calls, video conferencing, and messaging.
Multicast: Ideal for content distribution, and live video streaming, typically where one source reaches many recipients simultaneously.
5. Complexity:
SIP: Relatively straightforward call setup and management.
Multicast: Can be more complex to configure, requiring careful network design in a large-scale setting.
Please feel free to reach out to the Experts at VoIP Supply to further discuss your business needs. Give us a call at 1-800-398-8647 or visit us at www.voipsupply.com.
We here at VoIP Supply know how essential communication and collaboration tools are for businesses to thrive. With its impressive range of features, Zoom Phone has become a go-to platform. We are excited to share that now, thanks to the strategic alliance between Snom Americas and Phonism, using Zoom Phone has become even more convenient and hassle-free.
Snom Americas, a well-known provider of VoIP and SIP-based phones, has joined forces with Phonism, a leading platform for managing and deploying VoIP devices. Together, they are making waves in the industry by enhancing the user experience with Zoom Phone-certified Snom devices.
With this collaboration, users can now enjoy all Zoom-certified Snom devices ASAP, without the hassle of configuration. Snom devices will come pre-configured, so you don’t have to worry about spending time configuring devices on your end and possibly causing configuration errors affecting other endpoints. Zero-touch provisioning means you can take your device out of the box, plug it in, and start using it right away, without the need for complex setup processes.
The streamlined setup process ensures that you can be more productive from the moment you unbox your Snom device. No need to fumble with settings or call IT support for assistance.
To top it off, this Phonism integration comes with enhanced security features, network + SIP management tools, and remote command + control.
Whether you’re working from home, in the office, or on the go, you can count on Snom and Phonism to keep you connected seamlessly. Are you excited to see this partnership? Tell us your thoughts in the comments. If you have any questions, as always, please reach out to the VoIP Supply Experts at 1-800-398-8647 or visit us at www.voipsupply.com and send us a Chat
In today’s digital age, a reliable and high-performing network is the backbone of any organization. Whether you’re a small business, a large enterprise, or even a homeowner, the choice of network switch is crucial to ensure seamless connectivity. But with a multitude of options available, making the right decision can be daunting.
In this blog post, we will dive deep into the world of network switches, exploring the different types, features, and factors to consider when choosing the best one for your specific needs. By the end, you’ll be equipped with the knowledge to make an informed decision that maximizes your network’s efficiency and reliability.
What is a Network Switch?
A network switch is a networking device used to connect multiple devices within a local area network (LAN). It operates at the data link layer (Layer 2) of the OSI model and is designed to efficiently forward data packets between devices on the same network. Network switches use the physical (MAC) addresses of devices to determine how to forward data to the appropriate destination.
What are the Options?
We’ll introduce you to the various network switch types available in the market. From unmanaged switches that are simple to set up but offer limited control, to managed switches that provide advanced configurations, we’ll break down the options, their features, and use cases.
Unmanaged Switches: These are plug-and-play devices ideal for small networks, but they lack advanced control and monitoring capabilities.
Managed Switches: Offering greater flexibility, managed switches are perfect for businesses with complex networking needs, allowing for customization and performance optimization.
Layer 2 & Layer 3 Switches: Layer 2 (L2) and Layer 3 (L3) network switches differ in the way they handle data and the extent of their functionality within a network. The primary difference between Layer 2 and Layer 3 network switches is their capability to process and route traffic at different OSI model layers.
Factors to Consider When Choosing the Best Network Switch For You:
Selecting the right network switch involves assessing your specific requirements and understanding key factors such as:
Port Count: How many devices need to be connected to the switch? This will help you choose a switch with an appropriate number of ports. Consider future growth when making your decision.
Speed & Bandwidth: Delve into the importance of speed (e.g., Gigabit or 10 Gigabit) and bandwidth for handling data traffic effectively. Higher speeds are essential for data-intensive tasks and large networks. Bandwidth refers to the total capacity of the switch and should match the demands of your network.
PoE (Power over Ethernet): Learn about the advantages of PoE switches, which can power devices like IP cameras and phones over the Ethernet cable, , simplifying installation and reducing the need for separate power sources. Consider whether your devices require PoE support.
Quality of Service (QOS): Explore how QoS settings can ensure critical data traffic receives priority for a smoother network experience. QoS settings allow you to prioritize certain types of network traffic over others. This is crucial for ensuring that critical data (e.g., voice or video calls) receives priority. QoS is especially important for VoIP and video conferencing.
Reliability & Redundancy: Discover how redundancy features can keep your network running even in the face of hardware failures. Redundancy features, such as link aggregation or failover, can enhance network reliability. They ensure that the network keeps running even if there are hardware failures or network interruptions. Assess your need for redundancy based on the criticality of your network.
Scalability: Scalability is essential for future-proofing your network. Choose a switch that can accommodate future growth. Look for features that allow you to add more devices or expand your network without significant disruptions.
By considering these factors, you’ll be better equipped to select a network switch that aligns with your specific requirements and provides a solid foundation for your network infrastructure. Keep in mind that your network’s performance, security, and scalability depend on making the right switch choices. If you have any additional questions or comments, please feel free to leave a comment below, give us a call at 1-800-398-8647, or visit our website at www.voipsupply.com.
In an increasingly interconnected world, the need for rapid and effective emergency alerting systems has never been more critical. Whether it’s a natural disaster, a security breach, or a medical emergency, every second counts in ensuring the safety of individuals and the smooth operation of businesses and institutions. That’s where VoIP Paging/Alerting Systems, particularly those from Algo Solutions and CyberData, come into play, providing powerful tools to safeguard lives and property.
The Power of VoIP Paging/Alerting Systems
VoIP (Voice over Internet Protocol) technology has revolutionized communication across the globe. It allows voice and multimedia content to be transmitted over the internet, enabling cost-effective, scalable, and feature-rich solutions.
When it comes to emergency alerting, VoIP Paging/Alerting Systems offer several advantages:
Instantaneous Communication: VoIP systems transmit alerts instantly, minimizing response times during critical situations.
Scalability: They can be easily expanded to accommodate the needs of small businesses or large enterprises.
Reliability: VoIP systems are designed with redundancy and failover mechanisms, ensuring uninterrupted service even in adverse conditions.
Multimedia Capabilities: VoIP allows the integration of multimedia elements like text, images, and videos into alerts, enhancing the comprehensibility of emergency messages.
Centralized Management: Administrators can control and customize alerts from a central interface, making it easier to disseminate information efficiently.
Algo Solutions
Among the providers of VoIP Paging/Alerting Systems, Algo Solutions stands out for its commitment to innovation, quality, and reliability. Their range of products is designed to address a wide array of emergency alerting needs:
Algo 8301 SIP Paging Adapter: This compact device seamlessly integrates with existing paging systems, turning them into SIP-enabled communication tools. It’s ideal for retrofitting legacy systems for emergency alerting.
Algo 8180 SIP Audio Alerter: This high-performance audio alerter offers crystal-clear sound quality and versatile alerting capabilities. It’s perfect for broadcasting emergency notifications in large indoor or outdoor areas.
Algo 8186 SIP Horn Speaker: The 8186 is designed for wide-area coverage, making it an excellent choice for alerting in warehouses, factories, and open spaces.
Algo 8128 SIP Strobe Light: For situations where visual alerting is essential, the 8128 strobe light ensures that emergency messages are noticed, even in noisy environments.
Algo 1202 Call Recording Adapter: Ensuring compliance with emergency call recording requirements, this device captures and stores calls for later review and analysis.
CyberData
CyberData, another reputable player in the VoIP industry, offers a range of products that complement emergency alerting systems Additionally, they are also launching an innovative brand-new Hybrid Paging Solution!
CyberData 011214 SIP Outdoor Intercom: This rugged outdoor intercom is designed for reliable communication in harsh conditions, ensuring that emergency calls are never compromised.
CyberData 011324 SIP Talk-Back Speaker: Perfect for two-way communication, this speaker allows for real-time interaction during emergency situations, enhancing response coordination.
CyberData 011530 SIP Hand Wave Intercom: A gesture-activated device delivering touch-free two-way communication and secure access control for your VoIP phone system with just a wave of your hand.
CyberData 011579 SIP Paging 25V/70V Amplifier: COMING SOON! This Amplifier allows customers to use CyberData’s or their existing 70V, 25V, constant voltage speakers, and/or CyberData multicast endpoints in a VoIP environment. The SIP Paging 25V/70V Amplifier sends and receives multicast, including from any channel of Poly phones.
When it comes to emergencies, every second matters. VoIP Paging/Alerting Systems, including products from Algo Solutions and CyberData, provide a robust and versatile solution to ensure the safety and well-being of individuals in various settings. No matter the space or environment, implementing these systems can make a significant difference when lives are on the line. So, make the smart choice and invest in the power of VoIP technology to protect what matters most—people’s lives and safety. If you have any comments or questions, please feel free to leave a comment below, give us a call at 1-800-398-8647, or visit us on our website at www.voipsupply.com.
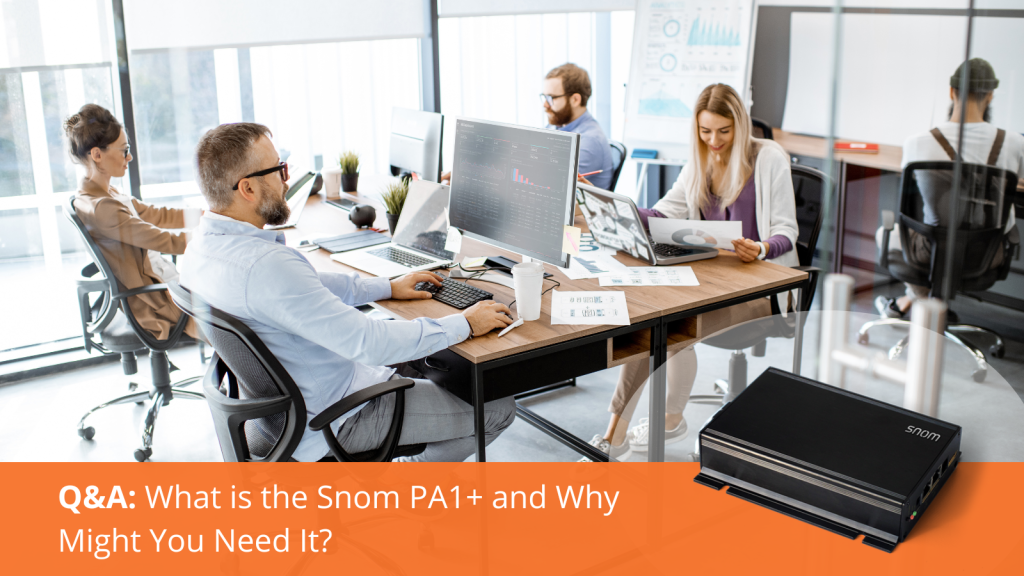
Are you familiar with Snom’s PA1+? VoIP Supply is here today to make sure you know exactly what it is and determine if this is a product that you may need!
Simply, the Snom PA1+ is a PoE public address system that lets you integrate your IP phone system with your announcement and notification systems. It’s like having a portable public announcement system in the palm of your hand.
This device may be right for you or your customers if:
You want to keep your team on the same page with clear and instant announcements.
You like providing clear announcements to customers announcing sales or promotions.
You need schools to relay announcements, bells, or alerts.
Your industrial environments will benefit from streamlined communication in busy manufacturing spaces.
You need to ensure critical information gets to the right people in healthcare settings.
Your hotel guests desire an even more comfortable experience with concierge services.
You need to provide essential information in airports, stations, and more.
Some key features include:
PoE Power: No need for extra power sources, thanks to PoE.
Audio Flexibility: Various audio inputs/outputs for versatility.
Built-in Amplifier: Crystal-clear audio, loud and proud.
Easy Setup: It’s a breeze to integrate with your existing phone system.
Web Control: Manage it through a user-friendly web interface.
Remote Operation: Control the device from a distance for convenience.
The Snom PA1+ may be your secret weapon to clear communication in a busy world. It’s a versatile solution for all your announcement and notification needs. Ask a VoIP Expert to inquire if the PA1+ is the perfect solution for you and/or your customers. Call 1-800-398-8647 or visit us at www.voipsupply.com and send us a Chat.
SIP Chats is back with the return of Greg Garrett of 3CX! This time around Greg will update us on what is new and what is coming from 3CX. The most notable, and most exciting topic of this episode is the long-awaited arrival of 3CX Version 20! Greg will dive into the details of its release, and what this update is going to bring to the table for new and current 3CX users!
Are you currently a 3CX user? Let us know in the comments, and tell us what you’re most excited about for the new 3CX Version 20.
In a world where communication is the backbone of every business, having reliable and feature-rich VoIP phones is essential. The Poly Edge E Series of VoIP phones are designed to meet the needs of a variety of organizations. In this blog post, we’ll explore the key features and options that make the Poly Edge E Series of VoIP phones a top choice for businesses looking to enhance their communication capabilities.
Introducing the Poly Edge E Series VoIP Phones:
Poly, formerly known as Polycom, is a leader in the communication and audio technology space. Their Edge E Series of VoIP phones are part of a range of products dedicated to delivering outstanding features.
Key Features of the Series:
High-Quality Audio: The Poly Edge E Series VoIP phones are renowned for their exceptional audio quality. Crystal-clear voice calls, HD audio, and noise-reduction technology ensure that every conversation is sharp and clear.
Integration with Unified Communications Platforms: The E Series phones seamlessly integrate with unified communications (UC) platforms like Microsoft Teams, Zoom, and Cisco Webex, streamlining your communication and collaboration.
Flexible Connectivity: Some models offer Wi-Fi and Bluetooth connectivity options, allowing you to connect wirelessly and reduce cable clutter.
HD Video Calling: Select E Series phones come equipped with high-definition video capabilities, enabling video calls and conferencing without the need for additional equipment.
Integrated Microban® Antimicrobial Protection: Reducing bacteria growth and stays more durable for longer with protection lasting a lifetime.
Meet the Poly Edge E Series:
Poly Edge E100/Poly Edge E220:2-line and 4-line keys with a 2.8” IPS LCD display with two position desk stand and wall mount hardware included
With integration capabilities, touchscreen displays, and support for expansion modules, these phones are designed to for organizations of all sizes.
Is the Poly Edge E Series right for you? Find out by contacting one of our VoIP Experts at 1-800-398-8647 or visit us at www.voipsupply.com and send us a Chat.
Your September VoIP News Update is here, and boy, did we see a lot of new product releases! In this month’s episode, we tackle brand-new products from Spectralink, Fanvil, and Cyberdata!
To kick things off, we’ll discuss the Spectralink S Series of DECT phones! These new additions to the Spectralink portfolio are ideal for retail, warehouses, healthcare, and so much more! Depending on how big or small your DECT solution needs to be, Spectralink offers the S33, S35, and S37 to ensure you get the features and functionality you need for your business.
Also for September, Fanvil has introduced their new big button phone, the X305! This phone is packed with features and offers ease of use with its simplistic profile and extra-large buttons. This new addition to the Fanvil lineup is perfect for nursing homes, hospitals, and more!
We are also excited to announce the release of CyberData’s new SIP Paging 25V/70V Amplifier! This groundbreaking new product offers a hybrid paging solution like we’ve never seen before! Some standout features are the built-in calendar-based scheduler and its ability to send and receive multicast!
Which new September product release are you most excited about? Let us know in the comments below!