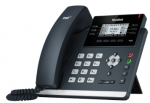
How to Change the Language on the Yealink T42S
It is no secret that entry-level IP phones are packed with features. They even do more than regular analog phones, period. Even as you climb up the IP phone scale to an executive level phone, it always seems like the phone will have some features that you could never imagine using.
But as we all know, there will come a time where you will need to use something that you never thought you would ever use, and this doesn’t just apply to your desk phone! This happens all the time in our everyday lives. As much as I’d like to blog about the time I actually needed to use a check to pay for something, we have to stick to the world of VoIP!
How to Change the Language on the Yealink T42S
So, today I am going to let you know how to change the language on your Yealink T42S! Doing this is actually quite simple. Just follow these few easy steps:
- Press the Menu button followed by Settings >Basic Settings >Language
- Press the up or down arrows on the phone to select the language of your choice
- Press the Save softkey to accept the change
And that’s it! After you save this change the text on the phone will change to your selected language. This may come in handy for users that need to see a different language other than English because the phone will display the English language by default. Other language examples to choose from are Chinese (Simplified), Chinese (Traditional) and French.
For those of us who use the English language natively, I cannot say when you will actually need to use this feature, but there are many different jobs and situations out there. For example, maybe you have a client visiting your office from overseas and he or she needs a desk and phone to use while they are visiting. No matter what is better to be prepared than not knowing at all! And of course, this could also be used as a pretty funny office prank too.
Have you ever needed to change the language on your desk phone? Let us know, and let us know why you needed to!
